Prevention and Reaction: Tips for Preventing Backcountry Rescue and what to do if rescue is needed8/17/2020  Backcountry rescues are logistically challenging and time consuming. However, having basic knowledge of the search and rescue (SAR) process and following a few important steps can help facilitate a smooth rescue. Proper advance planning before any trip helps prevent accidents. It also increases the likelihood that you and your companions won’t have to face the challenges of an evacuation or figure out a rescue plan. Use the following guidelines to prepare for your next adventure:
However, even with advance planning and preparation, emergencies and injuries can still occur. When you respond to an incident, whether it’s someone in your group, or a nearby party that needs help, first follow the Scene Size-Up, Initial Assessment, and Focused Assessment steps of the SIFT framework taught in Longleaf Wilderness Medicine courses. After the patient(s) is stabilized, depending on the severity of the accident, current location, and distance from a trailhead, you will have to make a decision about whether or not to evacuate and develop a plan. For minor injuries such as sunburns, bug bites, or small wounds, this decision may be simpler. However, it’s important to come up with a contingency plan based on anticipated problems if the situation escalates. For more severe injuries or for rescues that require skills beyond those of your group, a rescue will require additional resources. Several options for rescue include:
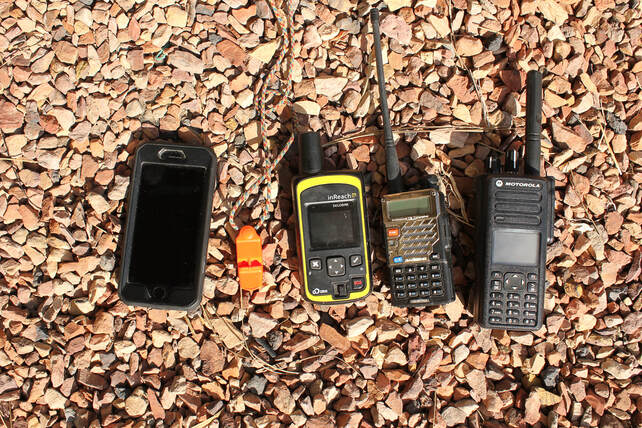
The goal of an evacuation is always to limit risk for everyone involved and minimize the time, energy, and resources required. If you’re facing a potentially serious situation and are debating whether or not to call 911, make the call. Nick Constantine, Chairperson and team member for Seattle Mountain Rescue says, “It’s not worth hedging your bets, and in most places in the U.S., SAR teams are free of charge, so you should always call.” If you have poor cell service and have a hard time reaching 911, Constantine suggests, “Just keep calling back, even a few seconds of a series of poorly connected calls can convey the message that something is wrong.” Before calling, take a few deep breaths and plan out what you’re going to say. Use a SOAP note template or SIFT as a framework for organizing your thoughts clearly and concisely. Always start the phone call by stating your name, where you are, and a “one-liner” that sums up your situation and/or the severity of the injuries. Constantine adds, “Provide as much information as you can, and be specific.” The 911 Dispatcher typically contacts the Deputy or Sheriff, who will then contact the local SAR agency or potentially the Fire Department. If necessary, the Deputy or Sheriff, or the rescue team, will contact you directly to start the rescue process. While a phone call is ideal, satellite messaging devices such as the Garmin inReach and SPOT devices are also effective options. Both devices have the ability to send an SOS message to an emergency response center, which then tracks your device and can notify responders in the area. Some devices allow you to send a pre-set custom message to friends and family (e.g. “I made it to the summit!”) or a message that you’re okay, but someone else is injured and needs help. Other satellite messaging devices feature two-way communication, which allows you to provide critical details about the nature of the emergency, updates on a patient’s condition, and be in direct contact with rescuers. Constantine notes that “for devices with simpler features, or just an SOS button, this can add an extra step as rescue teams then won’t know if something catastrophic or something more minor... but at the end of the day the call for help will get to the National Park or the Sheriff and teams will respond to assist.” Before you head out, make sure you know the capabilities of your equipment and how to use them. There is also a possibility that you cannot make contact with anyone. Ideally, you’ve given someone your trip itinerary ahead of time, and they could start the rescue process if you didn’t return or make contact when you were supposed to. In the meantime, if you’re in the field and unable to reach anyone, there are several things that you can do:
Even if you have made contact, in the best-case scenario, rescue is a slow process. It takes time to relay the information, assemble the team, make a plan, and then reach you. Trust that they are trying to get there as fast as they can. Once the team reaches you, evacuation can still be a lengthy process. Extrication from a tricky spot can be extremely complicated, especially if someone is badly injured. Carrying someone out on a litter can take four to six times as long as hiking on an easy trail, and even longer on a more difficult route. Additional considerations also have to be made for weather, terrain, availability of team members, and rescue supplies. Sometimes, even if a helicopter can be deployed, it may not be able to land, or might have to come back at a different time due to weather conditions or time of day. Planning ahead, thoroughly assessing a situation, making thoughtful decisions, and staying calm will help streamline a safer and quicker rescue process for everyone involved. Need to know more? Access LWM's online Remote Communication lesson now! Caitlin GaylordCaitlin teaches wilderness medicine because she believes in empowering others to be prepared in the backcountry. Outside of work, Caitlin spends time rock climbing, running, writing, and trying new bread recipes.
1 Comment
|
Archives
December 2020
Categories
All
|

 RSS Feed
